Debian

AFAIK this was accomplished

The new scheme uses names usually derived from the location of the interface in terms of hardware buses etc: eno1, wlp1s3. The idea was that this provides “Predictable Names”, though as it turns out the main thing that’s predictable about it is that calling it this will cause furious users to pop up disputing the appropriateness of that name. (Can we just skip all that here, please?)

Source: NetworkInterfaceNames – Debian Wiki

I lol’d

AFAIK this was accomplished Read More »

The more things change the more they stay the same

I first started using Linux and FreeBSD on laptops in the late 1990s. Back then, there were all sorts of hassles and problems, from hangs on suspend to pure failure to boot. I still worry a bit abo…

Source: Managing an External Display on Linux Shouldn’t Be This Hard | The Changelog

Evidently nothing has changed since we stopped using Linux as our daily driver OS. We were actively thinking of switching back as we got tired of Windows rebooting on me whenever it felt like. Slight problem— We have two 4K displays and two 1080p displays hooked to a Radeon GPU and AMD isn’t particularly nice about proper driver support; they’re better than Nvidia but not by much.

We hate to think what would happen if we have to switch to a laptop full-time. We’d probably give in fully to the dark side and run WSL on Win11. More and faster progress is being made on running desktop applications on it than people are doing on fixing these issues on “real” Linux.

The more things change the more they stay the same Read More »

Fucken’a

MMDAS PURAS MMDAS

The fucken site broke and I had no idea why.

Nginx seemed to be okay. PHP seemed to be okay. MariaDB had nothing to do with any of this. But anything PHP-based was throwing a fit and just didn’t work at all and of course logging in PHP is hit-or-miss.

After banging my head for two fucken nights I just backed everything up and nuked the server. Switched fron nginx back to Apache, downgraded to PHP 7.3 and kept MariaDB.

I’m just going to keep stuff on Debian Stable for the time being.


Update 2021-03-02_03-28

I’M STILL DEALING WITH THIS.

Fucken’a Read More »

You did good!

After two years…. it was time to retire my trusty Thinkpad T60 that I turned into a WiFi AP for my LAN. Its name is blackslab and it’s been with me for about 8 years now. She’s earned a nice long break.

Thinkpad T60

I had been running into a ton of issues lately:

  • There are way too many wireless networks around me. A quick look at the network selector on Windows has 11 networks in there. This was interfering with my gaming.
  • Debian is a fucking bitch to deal with these days. Systemd is polluting everything in it.
  • Network instability is a thing. After every reboot I had to manually bring the WAN interface up. It’s a thing and I just didn’t want to deal with it anymore.

So now I’m setting up FreeBSD on a small form factor PC to take its place. It’s not the cheapest when it comes to energy use but it should do the trick. In the interim I’ve got a cheap ASUS router running things since Windows ICS is so fucking unreliable; tried setting up FreeBSD through it and it was a slog.

Hopefully I’ll be able to stop banging my head against PF sometime in the next 12 hours so I can actually set the thing up as the main LAN controller.

You did good! Read More »

A Debian Wifi Router: THE REBOOT

Just like a Hollywood movie, it’s time to do a reboot. Fucking around with the networking stack after every reboot got old real fast. But this time around it looks like the remake is actually better than the original.

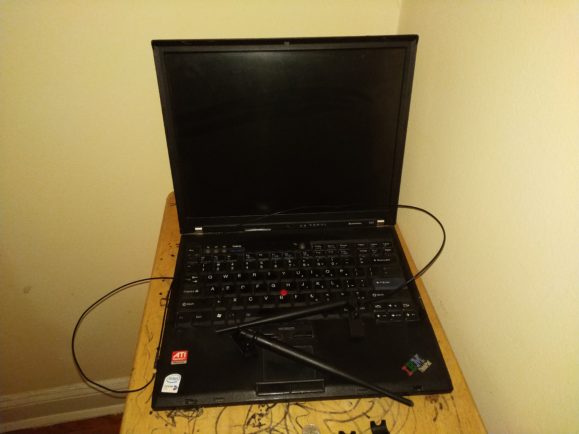
The router is still my trusty Thinkpad T60. Other than a couple of scares because of its age it still works! Just need to replace the CPU fan sooner rather than later.

Sources for this were:

Yes, this writing assumes you know what you’re doing on the command line.

Install Operating System

Whatever your version of Debian is, make sure that it’s up to date and that you install the stuff you’ll need:

# aptitude install hostapd rfkill dnsmasq fail2ban

Switched away from BIND and ISC-DHCP because they’re a pain in the ass to deal with. Maybe in the future I’ll use them again, but for the time being… this will do the trick.

Something I keep doing and forgetting to document is changing sshd port from 22 to something else and switching from password authentication to key-based authentication. Fail2ban is useful in blocking people trying to force their way in.

Networking

I had to add both wlan0 and wlan1 manually. Why? Dunno. I suppose they only get added automatically when you’re installing Xorg, which I’m not. Here’s my /etc/network/interfaces:

# This file describes the network interfaces available on your system
# and how to activate them. For more information, see interfaces(5).

source /etc/network/interfaces.d/*

# The loopback network interface
auto lo
iface lo inet loopback

# The primary network interface
auto eth0
iface eth0 inet dhcp

# Intel PRO/Wireless 3945ABG (Golan) Rev 02
#auto wlan0
#allow-hotplug wlan0
#iface wlan0 inet dhcp

# Qualcomm Atheros AR922X Wireless Network Adapter (rev 01)
auto wlan1
allow-hotplug wlan1
iface wlan1 inet static
    address 192.168.1.1
    netmask 255.255.255.0

iptables

Edit /etc/sysctl.conf and uncomment the line for ipv4 packet forwarding:

net.ipv4.ip_forward=1

Create /etc/network/if-pre-up.d/iptables with the following contents:

#!/bin/sh
/sbin/iptables-restore < /etc/network/iptables

Change permissions and make executable:

# sudo chown root /etc/network/if-pre-up.d/iptables
# chmod 755 /etc/network/if-pre-up.d/iptables

Create /etc/network/iptables and put the following in it:

*nat
:PREROUTING ACCEPT [0:0]
:INPUT ACCEPT [0:0]
:OUTPUT ACCEPT [0:0]
:POSTROUTING ACCEPT [0:0]
# eth0 is WAN interface
-A POSTROUTING -o eth0 -j MASQUERADE

COMMIT

*filter
:INPUT ACCEPT [0:0]
:FORWARD ACCEPT [0:0]
:OUTPUT ACCEPT [0:0]

# Forward traffic from wlan0 (LAN) to eth0(WAN)
-A FORWARD -i wlan0 -o eth0 -j ACCEPT

# Service rules
-A INPUT -j ACCEPT

# Forwarding rules
-A FORWARD -j ACCEPT

COMMIT

This part remains unchanged from my the initial post. If you want it to do a more thorough job of filtering packets the Ars post is a good place to start.

dnsmasq

Edit /etc/dnsmasq.d/local.conf:

# If you don't want dnsmasq to read /etc/resolv.conf or any other
# file, getting its servers from this file instead (see below), then
# uncomment this.
no-resolv

# Never forward addresses in the non-routed address spaces.
bogus-priv

# If you want dnsmasq to listen for DHCP and DNS requests only on
# specified interfaces (and the loopback) give the name of the
# interface (eg eth0) here.
# Repeat the line for more than one interface.
interface=wlan1

# Uncomment this to enable the integrated DHCP server, you need
# to supply the range of addresses available for lease and optionally
# a lease time. If you have more than one network, you will need to
# repeat this for each network on which you want to supply DHCP
# service.
dhcp-range=192.168.1.1,192.168.1.100,24h

# Set nameservers to use
server=192.168.1.1
server=8.8.8.8
server=8.8.4.4
server=208.67.220.220

Then restart the service with # service dnsmasq restart.

Much, much simpler than trying to configure both BIND and ISC-DHCP just for local networking. The options I included are pretty self-explanatory. If you're going to be assigning IP addresses on more interfaces, make sure to add them.

hostapd

The great big bad. If your card doesn't support Master mode, just stop trying now and go get yourself a plain old router.

For me these are the settings that work on my Atheros card. You will need to figure out what settings work on your own based on your hardware; you can query its capabilities with iw.

Edit /etc/hostapd/hostapd.conf:

# the interface used by the AP
interface=wlan1
# a means 5GHz, g means 2.4GHz
hw_mode=g
# the channel to use. Using 0 will make the AP use ACS to search for the channel with least interference
channel=0
# limit the frequencies used to those allowed in the country
ieee80211d=1
# the country code
country_code=US
# ieee80211n: Whether IEEE 802.11n (HT) is enabled
ieee80211n=1
# QoS support
wmm_enabled=1

# SSID (name of the AP)
ssid=SSID
# 1=wpa, 2=wep, 3=both
auth_algs=1
# WPA2 only
wpa=2
wpa_key_mgmt=WPA-PSK
wpa_pairwise=CCMP TKIP
rsn_pairwise=CCMP
wpa_passphrase=KEY

I tried using hw_mode=a but then OSX and iOS devices have a hard time connecting and staying connected to the network, so I switched bands to 2.4GHz. It's slower but far more stable. You'll want to configure the ht_capab command to better make use of your NIC.

After this is done, edit /etc/default/hostapd, and change the DAEMON_CONF line to match the location of the hostapd config file:

DAEMON_CONF="/etc/hostapd/hostapd.conf"

Make sure to test out the configuration file by actually running hostapd and making sure it runs:

# hostapd /etc/hostapd/hostapd.conf

If you run into issues here you'll have to determine where the issue is coming from:

  • Network card driver
  • Hostapd configuration

In that case run hostapd with one of the debug switches (hostapd -d /etc/hostapd/hostapd.conf) to figure this out. For maximum driver support the best option is to use Atheros-based cards using the ath5k, ath9k and ath10k drivers. Various cards from other suppliers will work, but will require fiddling with the configuration. They're worth a shot if you need to share Internet access with others around you quickly.

Reboot

Yes, you'll actually want to reboot at this point. Why? Because the point of a router is that when you turn it on everything works automatically, without you having to manually start a service. So reboot, and check that

  • All services come up by themselves
  • You're able to have the system act as a router
  • You're not having latency/DNS/throughput anomalies

That's pretty much it. It's a better setup than the first one and it's much easier to control with much less software installed.

A Debian Wifi Router: THE REBOOT Read More »

A Debian Wifi Router: Kernel tuning

So it turns out that if you go with the default kernel parameters on the device you won’t get much throughput. I’m currently paying my ISP for a 25Mbit/s pipe both ways, which is bloody awesome.

I was having problems with throughput and network jitter, though. I was able to have a fast connection from my devices to the router and the router had the full connection available to itself; problems were the router was not able to make the full connection bandwidth available to its clients and the bandwidth would go from 25Mbit/s all the way down to 5Mbit/s all the time.

This is really damn annoying when you’re putting in a good match on Unreal Tournament, let me tell you.

Thinking it could be something related to hostapd I played around with a few more settings but nothing really made a difference. I’m having problems with reception and throughput in my bedroom but that’s for another post, I guess. Suffice to say that with a direct line of sight to the router everything works about as expected.

So it wasn’t hostapd. Played around with iwconfig and iw but neither made much of a difference. That left the network interfaces themselves and the kernel.

Dug around and found plenty of links and articles on what settings to adjust and how to adjust them but all of them are geared towards servers of some sort. There isn’t much information that a home/office IT guy would be able to use for tuning the kernel for bandwidths of less than 100Mbit/s, which is what I’m attempting to do here. The most popular post (which I basically copied into my configuration) is using settings for 1Gbit/s connections that I then changed with the one entry that matched from the Ars Technica post.

Here’s sysctl.conf as I have it right now:

# /etc/sysctl.conf - Configuration file for setting system variables
# See /etc/sysctl.d/ for additional system variables.
# See sysctl.conf (5) for information.
#

#kernel.domainname = example.com

# Uncomment the following to stop low-level messages on console
#kernel.printk = 3 4 1 3

##############################################################3
# Functions previously found in netbase
#

# Uncomment the next two lines to enable Spoof protection (reverse-path filter)
# Turn on Source Address Verification in all interfaces to
# prevent some spoofing attacks
#net.ipv4.conf.default.rp_filter=1
#net.ipv4.conf.all.rp_filter=1

# Uncomment the next line to enable TCP/IP SYN cookies
# See http://lwn.net/Articles/277146/
# Note: This may impact IPv6 TCP sessions too
#net.ipv4.tcp_syncookies=1

# Uncomment the next line to enable packet forwarding for IPv4
net.ipv4.ip_forward=1

# Uncomment the next line to enable packet forwarding for IPv6
#  Enabling this option disables Stateless Address Autoconfiguration
#  based on Router Advertisements for this host
#net.ipv6.conf.all.forwarding=1


###################################################################
# Additional settings - these settings can improve the network
# security of the host and prevent against some network attacks
# including spoofing attacks and man in the middle attacks through
# redirection. Some network environments, however, require that these
# settings are disabled so review and enable them as needed.
#
# Do not accept ICMP redirects (prevent MITM attacks)
#net.ipv4.conf.all.accept_redirects = 0
#net.ipv6.conf.all.accept_redirects = 0
# _or_
# Accept ICMP redirects only for gateways listed in our default
# gateway list (enabled by default)
# net.ipv4.conf.all.secure_redirects = 1
#
# Do not send ICMP redirects (we are not a router)
#net.ipv4.conf.all.send_redirects = 0
#
# Do not accept IP source route packets (we are not a router)
#net.ipv4.conf.all.accept_source_route = 0
#net.ipv6.conf.all.accept_source_route = 0
#
# Log Martian Packets
#net.ipv4.conf.all.log_martians = 1
#
# Kernel parameter adjustments
# 2016/09/12 02:59:32: http://www.nateware.com/linux-network-tuning-for-2013.html
# http://arstechnica.com/gadgets/2016/04/the-ars-guide-to-building-a-linux-router-from-scratch/
#
kernel.sem = 250 256000 100 1024

# Increase system file descriptor limit
 fs.file-max = 100000
#
# # Discourage Linux from swapping idle processes to disk (default = 60)
 vm.swappiness = 10
#
# # Increase ephermeral IP ports
 net.ipv4.ip_local_port_range = 10000 65000
#
# Increase Linux autotuning TCP buffer limits
# Set max to 16MB for 1GE and 32M (33554432) or 54M (56623104) for 10GE
# Don't set tcp_mem itself! Let the kernel scale it based on RAM.
net.core.rmem_default = 4194304
net.core.rmem_max = 4194304
net.core.wmem_max = 4194304
net.core.rmem_default = 4194304
net.core.wmem_default = 4194304
net.core.optmem_max = 40960
net.ipv4.tcp_rmem = 4096 87380 4194304
net.ipv4.tcp_wmem = 4096 65536 4194304

# Make room for more TIME_WAIT sockets due to more clients,
# and allow them to be reused if we run out of sockets
# Also increase the max packet backlog
net.core.netdev_max_backlog = 25000
net.ipv4.tcp_max_syn_backlog = 4096
net.ipv4.tcp_max_tw_buckets = 200000
net.ipv4.tcp_tw_reuse = 1
net.ipv4.tcp_fin_timeout = 10

# Disable TCP slow start on idle connections
net.ipv4.tcp_slow_start_after_idle = 0

# If your servers talk UDP, also up these limits
net.ipv4.udp_rmem_min = 8192
net.ipv4.udp_wmem_min = 8192

# Disable source routing and redirects
net.ipv4.conf.all.send_redirects = 0
net.ipv4.conf.all.accept_redirects = 0
net.ipv4.conf.all.accept_source_route = 0

# Log packets with impossible addresses for security
net.ipv4.conf.all.log_martians = 1

Everything in here I’m sure can be tuned further and the file itself is so damn ugly to look at but for now at least I have a starting point I can use.

All this tomfoolery is turning me into a network wonk.

A Debian Wifi Router: Kernel tuning Read More »

A Debian wifi router

The search of a living space has been over for over a month now and I’m more or less settled in. I had a bad experience with my previous landlord keeping my wireless router (an Asus AC-RT68U) cos he’s a fucking asshole so I decided to give this a shot. I’m actively trying to solve money now so it really wasn’t an option to just buy another one as my living costs are now much, much higher.

I’ve hoarded a bit of equipment so I did have a couple of computers available to me. With a bit of looking I found about hostapd and I got it to work more or less reliably on a Thinkpad X220 with an Intel Centrino chipset using the iwlwifi driver. The real problem started when I tried using my older Thinkpad T60 laptop for the same task. Mine has an Intel PRO/Wireless 3945ABG [Golan] chipset also using the iwlwifi driver but the crucial difference was that this chipset doesn’t support Master mode, so you can’t use it with hostapd to enable an AP. Looked around for a bit and tried using this Archer T2UH from Amazon but the support on Linux is a fucking joke, basically; they actually want you to compile the drivers from scratch to get everything going. Ended up with an Ubiquiti Networks SR71-C card using the ath9k chipset. I tried setting it up using the already-installed environment but I couldn’t get it work so I basically reinstalled everything from scratch to start fresh.

I pieced this together from instructions found on the Debian Wiki, this guide from Ars Technica on building your own router, hostapd documentation, and a whole host of blog posts detailing how to pull this off, most of them with information easy to mess up.

As it is right now I’m typing this up on a Windows 10 system connected to the laptop and the signal and throughput are good enough for extended sessions playing Unreal Tournament pre-alpha.

Install Operating System

Installed Debian Stable fresh on the system with no desktop environment. This computer will now be a router so we don’t need any kind of desktop environment. Most desktop environments now require NetworkManager or wicd to manage network connectivity and I wanted to avoid all that crap. It just makes things more complicated for something that will be complicated enough already. I used the netinst install media with the laptop connected to ISP through Ethernet and getting an IP address through DHCP, so I didn’t have to fiddle with any PPPoE clients to get online and install the stuff required.

# aptitude update
# aptitude install hostapd bridge-utils isc-dhcp-server bind9 rfkill vbetool vim-runtime vim-goodies tmux

Enable Wifi Adapter

For some weird and lame reason Debian didn’t enable the adapter after installation, so it has to be setup manually. These instructions are based on the Debian Wiki. Atheros card is wlan0 while built-in Intel adapter is wlan1.

# ip a
# rfkill unblock all
# iwconfig
# ip link set wlan0 up
# iwlist scan

The card scanned for networks around so it was working.

Edit /etc/network/interfaces so the WLAN interface doesn’t wait for an IP address. If you don’t do this it turns out the OS stops booting until it gets bored of waiting for an IP address.

auto wlan0
iface wlan0 inet static
    wireless-mode Master
    address 192.168.1.1
    netmask 255.255.255.0

You can use whatever IP address (like 10.0.0.1) but make sure the same subnet is used throughout the entire configuration. I went with 192.168.1.1 cos that’s what I like my networks to be on.

Configure iptables

Edit /etc/sysctl.conf and uncomment the line for IPV4 packet forwarding:

net.ipv4.ip_forward=1

Create /etc/network/if-pre-up.d/iptables with the following contents

#!/bin/sh
/sbin/iptables-restore < /etc/network/iptables

Then

# sudo chown root /etc/network/if-pre-up.d/iptables ; chmod 755 /etc/network/if-pre-up.d/iptables

Create /etc/network/iptables and put the following in it:

*nat
:PREROUTING ACCEPT [0:0]
:INPUT ACCEPT [0:0]
:OUTPUT ACCEPT [0:0]
:POSTROUTING ACCEPT [0:0]
# eth0 is WAN interface
-A POSTROUTING -o eth0 -j MASQUERADE

COMMIT

*filter
:INPUT ACCEPT [0:0]
:FORWARD ACCEPT [0:0]
:OUTPUT ACCEPT [0:0]

# Forward traffic from wlan0 (LAN) to eth0(WAN)
-A FORWARD -i wlan0 -o eth0 -j ACCEPT

# Service rules
-A INPUT -j ACCEPT

# Forwarding rules
-A FORWARD -j ACCEPT

COMMIT

At this point iptables will simply pass along all the traffic that his the computer. I’ve since changed my configuration but this is a starting point as I just wanted to get online at this point. iptables rules are a pain in the ass to type.

Configure DHCP

Edit /etc/dhcp/dhcpd.conf and add the following at the end of the file:

subnet 192.168.1.1 netmask 255.255.255.0 {
range 192.168.1.100 192.168.99.199;
option routers 192.168.1.1;
option domain-name-servers 192.168.1.1;
option broadcast-address 192.168.1.255;
}

Configure DNS

BIND works out of the box, thankfully enough.

Configure hostapd

Create and edit /etc/hostapd/hostapd.conf and put the following in it:

interface=wlan0
driver=nl80211
# SSID on 5GHz band
ssid="MY WIFI NETWORK"
hw_mode=a
channel=44

# Radar an' stuff
country_pre=US
ieee80211d=1
ieee80211h=0

# 802.11n goodness
wmm_enabled=1
ieee80211n=1

# wpa
auth_algs=1
wpa=3
wpa_passphrase=MyWifiPassword
wpa_key_mgmt=WPA-PSK
wpa_pairwise=TKIP
rsn_pairwise=CCMP

ht_capab=[HT20][HT40+][SHORT-GI-40][TX-STBC][RX-STBC1][DSSS_CCK-40]

The ht_capab are the ones I’ve found work with the SR71-C card. I’ll keep playing with them.

At this point everything looked good and rebooted. I actually rebooted a whole bunch of times as I kept prodding and poking stuff every step of the way but I guess it all could be done in one go and just reboot at the end.

Actually be a Wifi Router

After rebooting do

$ sudo hostapd /etc/hostapd/hostapd.conf

Runs with the SSID, picks a channel, and starts the laptop as an AP. iptables is routing traffic from one interface to another, ISC DHCP gives out IP addresses and BIND does DNS. I did run into an issue where wlan0 kept sending out DHCP requests to which dhcpd would successfully assign a new IP address for wlan0. I got lazy and just set a static IP for the mac address of the interface on dhcp.conf. I’ll fix it… eventually.

There’s also the issue of tuning the kernel, firewall and a lot of other stuff since the computer is a single-purpose device rather than a multi-user computer. Most of the documentation I can find is for systems handling traffic at internet scale that would be overkill, so a lot of documentation will be read and a ton of adjustments made.

There will be also a lot of adjustments to hostapd itself to maximize throughput and signal stability. The SRC71C card only does 802.11n but the bitrate on this standard maxes out depending on the blue of the sky, the stage of the moon, how hot the dumpster fires are on twitter and how pissed off the boss is at work.

From what I’m getting this is relatively new stuff when it comes to DIY. People were doing this in the past but was way more costly (like this sweet setup right here). I’m doing this on the cheap and it seems to be working well enough.

A Debian wifi router Read More »

Debian and google-talkplugin

A few months ago I lost the capability of making phone calls through Gmail on my Debian laptop or through Google Voice. While it was a bit of an annoyance, I never minded it much because I always had my phone or my Windows 8 laptop available and I could use them instead.

A few days ago I tried using Google Hangouts out of curiosity because it keeps getting props as a good service to make video calls with and since Skype keeps getting worse and worse all the time.

Okay, so Hangouts only works on Chrome. Fine, I’ve got Chromium installed. Fire it up, install the extension… then nothing. Hangouts couldn’t connect to the AV hardware. Logged in to Gmail, tried making a phone call… same thing.

Now I had two separate browsers have the same issue on the same system. A bit of searching drove me to a few blog posts here and there, but nothing in detail. Then I struck gold with this post buried in the Google Products forum:

This worked for me:

This turned out to be a libudev problem. It seems I had two versions installed for some reason. Removing libudev0 solved the problem. My version of chrome depended on that version, so I had to reinstall that as well.


$ dpkg --get-selections | grep -i libudev
libudev0:amd64 install
libudev0:i386 deinstall
libudev1:amd64 install
libudev1:i386 install
$ apt-get remove google-chrome-beta
$ apt-get remove libudev0
$ dpkg -i ./google-chrome-beta_current_amd64.deb

First I checked what libudev libs were installed, finding out both libudev0 and libudev1 were installed just like in the forum post, so the fix was pretty straightforward:


# aptitude remove chromium libudev0 iceweasel
# aptitude install chromium iceweasel

That was pretty much it. After this, I tried placing a call through Gmail on Iceweasel and had no problems. Firing up Chromium and trying to initiate a video call reported no issues either.

Everything is as it should be. Now if Google published a version of Picasa native to Linux…

Debian and google-talkplugin Read More »

C’mon, now

I’ve been trying to get the damn Debian Wheezy installer to work via USB on a Thinkpad T60 for the past three days without any success. Sure, it works like a charm when put on a CD or a DVD and booting from there, but that is beside the point.

I’ve tried various methods I’ve found on the web and on the Debian wiki without avail. To use any of them, you need to fuck around with the terminal, or installing things (as in the case of unetbootin). As it is right now, most Linux installers still can’t easily be put on USB drives without fucking around on the command line and getting things wrong a few times.

I realize I’m just venting, but… really, it is now past mid-2012. Apple is selling its OS X via digital delivery. Microsoft is about to do the same with Windows 8, and did sell Windows 7 installers on USB drives.

Linux should have gotten there years ago, to make it easy for people to try it out and keep their files around with them. Instead, we have lots and lots of guides for “the perfect $LINUXDISTRO USB install”, all of which are outdated within a few months. This would have led to Linux spreading virally among the common user, instead of just staying in the nerd ghetto.

Combine this with motherboards implementing UEFI and Linux installers not supporting it, and the future is getting ever dimmer for “Linux on the desktop.” Next time someone says “This is the year of Linux on the desktop” I will laugh at them on their face.

C’mon, now Read More »

Set Qt mouse pointer inside GNOME

You don’t have to install theme packages, engines or extra apps. All you need is already on your Debian system:

# update-alternatives --config x-cursor-theme There are 2 choices for the alternative x-cursor-theme (providing /usr/share/icons/default/index.theme).

Selection    Path                             Priority  Status
------------------------------------------------------------
* 0     /usr/share/icons/DMZ-White/cursor.theme   90    auto mode
  1     /usr/share/icons/DMZ-Black/cursor.theme   30    manual mode
  2     /usr/share/icons/DMZ-White/cursor.theme   90    manual mode

Press enter to keep the current choice[*], or type selection number: 1 update-alternatives: using /usr/share/icons/DMZ-Black/cursor.theme to provide /usr/share/icons/default/index.theme (x-cursor-theme) in manual mode.

If you’re not using Debian, it seems the way to go is to follow /usr/share/icons/default/index.theme with the following:

[Icon Theme]
Inherits=DMZ-Black

Either method sets the cursor theme systemwide through Xorg itself. To set it for a single user, add the following to ~/.Xdefaults:

Xcursor.theme: DMZ-Black
Xcursor.size: SIZE #optional

In my own case, I was using the the DMZ-Black theme on GTK applications, but Qt3/Qt4 applications (Amarok 1.4, Clementine, Skype, KeepassX) had the mouse pointer switch to DMZ-White when it entered their windows. Nothing that would cause trouble, but annoying if you want a consistent look across your environment.

As said before, this avoids unnecesary cruft on your system and works for all desktop environments you might have on your system.

Tips grabbed from here.

Set Qt mouse pointer inside GNOME Read More »

The no-bullshit Samba plus Nautilus network shares method.

Here is how to setup Samba and GNOME Nautilus to allow user directory sharing without having to allow root access. These commands are made with Debian in mind, so if you want to use them for your Linux distribution, you’ll have to adapt them.

  1. Install samba and nautilus-share.
  2. # aptitude install samba nautilus-share

  3. Rename your smb.conf to smb.conf.master
  4. # cd /etc/samba
    # mv smb.conf smb.conf.master

  5. Add the following to smb.conf.master somewhere under the [global] stanza using your favorite text editor.
  6. security = SHARE
    usershare allow guests = Yes
    usershare owner only = No

  7. Run the following command:
  8. # testparm -s smb.conf.master > smb.conf

    This tests the samba master configuration file, then outputs the results to the file samba itself will use for its configuration. If it finds errors, it will warn you about them.

    According to the Samba docs, a small smb.conf file improves performance. It also improves readability once you’re familiar with Samba options.

  9. Restart samba.
  10. # /etc/init.d/samba restart

  11. Add your user to the sambashare group. If more people use the system and they need to share files, make sure to add them as well.
  12. # useradd -G sambashare foo

  13. Log out of your user session, then log back in.
  14. On Nautilus, when you right-click directories you will now see a “Sharing options” item. Through this item you can:
    • Share the folder, assigning a share name.
    • Allow read/write access.
    • Enable Guest access, which allows people without a user account on the system to access the share.

This last option is the most useful as people can now get stuff through the network without having to deal with usernames or passwords. Does this make the Linux system behave like a Windows system? Yes, it does.

There is something to be said, however, about the convenience of creating shares without having to muck around the smb.conf.master file whenever you want to make a change.

The no-bullshit Samba plus Nautilus network shares method. Read More »

Debian

Lenny is good. Rock solid, just like the name ‘Stable’ promises.

But it wasn’t enough. So I updated to Squeeze.

That wasn’t enough. Went up to Sid. These guides helped.

So now I’m running the latest and would-be-greatest. Going to run a server with it.

Yes, I’m insane.

Debian Read More »