tiddlywiki

Another attempt at a note-taking workflow

In a previous post I mentioned one of the tools I use is Wiki.js. It was a great thing to learn how to set it up but… I was never entirely happy with it:

  • It’s somewhat slow on loading.
  • Not that customizable yet.
  • The update process is a total pain in the ass. They want you to use Docker and this ‘ere server can run it but performance wouldn’t be that nice.
  • On mobile I have to depend on the vagaries of whatever browser I’m using (Firefox) so I don’t get that good of an editing interface.
  • This is a private repository of knowledge so if it turns out wiki.js has a security issue my wiki is now at risk until I go through the pain of updating again.

So that’s that. I’d been playing with vimwiki since it’s text-based. After a bit of playing I was able to make it work nicely on the gVim instance I run on the Windows 10 desktop and the Ubuntu instance I run in WSL.

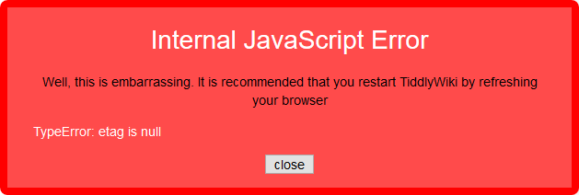
The mobile side of things was immensely helped along by Epsilon Notes, which blows iA Writer completely out of the water. Along the way I tried using Joplin which at first glance seems awesome but then you run into this issue:

Screencapture of JoplinApp filenames

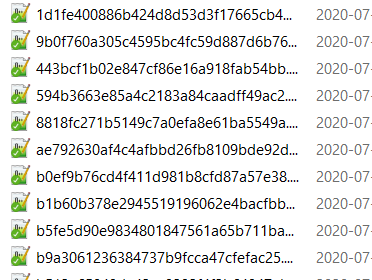
Yes, I get the logic of completely unique filenames but it also means that I’m locked into the app. This is something people have complained about as it defeats all efforts at interoperability. I mean, these are fucken markdown files. And this is an open source app!

Oh right, it also uses its own WebDAV connection to the Nexcloud instance, so slow your roll.

So back to Epsilon. It’s got a few goodies:

  • Line numbers
  • CommonMark is the default markdown dialect.
  • It’s native to Android.
  • Let’s you use front matter for tags but doesn’t require it. I personally don’t care for it.
  • It sets up its own folder in the device filesystem which you can then sync with Nextcloud.

The workflow

All right, so this is what I have right now

vim/gvim

Assuming there’s already a working Windows gVim instance, a working WSL installation, and a working Nextcloud desktop client:

  1. Setup vim with vimwiki.
  2. Configure vimwiki to store its files in a directory being synced by the Nextcloud desktop client. For the sake of simplicity and avoid changing my .vimrc file unnecesarily in WSL/ubuntu I symlinked ~/vimwiki to the appropriate directory in Windows; this way the _vimrc file in gVim could remain the same. Using either vim instance gets me to the same location.
  3. Create your vimwiki index file: <Leader>ww, and save it. It should get picked up by Nextcloud.

Nextcloud

Using the web interface or the Android client, mark the vimwiki folder as a favorite so Nextcloud keeps it synced at all times. I don’t think there’s a way to do this in the desktop client yet.

Epsilon Notes

Assuming there’s already a working Nextcloud app

  1. Install Epsilon from the Play Store.
  2. Tap the folder icon on the top right and navigate to /storage/emulated/0/Android/media/com.nextcloud.client/nextcloud/USER@HOST/vimwiki/. If you have multiple Nextcloud accounts on the same app you’ll see all of those listed with a USER@HOST folder each and you can just jump between folders.

Another way of doing this is setting up custom folders but I think doing it this way makes for a simpler configuration. It’d probably be really useful you have multiple vimwikis or multiple Nextcloud accounts though.

Bonus: Servers

I have a couple of boxes that run headless and I also wanted to have my notes available on there. There isn’t a terminal Nextcloud client but I found Rclone. I could have used cadaver but Rclone is designed specifically for cloud file storage:

These instructions worked under my Debian 10 install:

  1. Install rclone and fuse3: sudo aptitude install rclone fuse3.
  2. Configure Rclone with rclone config. Documentation.
  3. Create an Rclone mount with something like
rclone --vfs-cache-mode writes mount NEXTCLOUD:/vimwiki ~/vimwiki --daemon

Which assumes NEXTCLOUD is what you named the remote configuration, your vimwiki directory lives at $HOME, and you want the connection to remain alive until you decide to stop it manually. The --vfs-cache-mode writes flag will enable some amount of caching. Documentation.
4. At this point you can access your vimwiki as if they were on the local filesystem.

Fucken awesome amirite

SO now we have wiki-like notes that can be edited on desktop, mobile, or server, using whichever editor you prefer. Another bonus: You’re not locked in to anything. I could edit notes on desktop with Notepad++, Sublime Text, or Atom. On mobile you can edit them with whatever text editor you end up with. On a server you can edit them natively with whatever you have at hand.

And in the sad event you don’t have anything you can still access them through the Nextcloud web interface. They even got a markdown editor but I’m not sure what dialect it uses.

The only thing I dont have anymore is a nice clean way to print these notes but this is where pandoc and a print.css file should be useful. If worst comes to worst I can always paste something into LibreOffice and just change the styling that way. Another thing I’ll have to change is how I search for things but since I do have access to the terminal I can always resort to grep if worst comes to worst.

Extras

I did have a few things that led me to try and avoid using web interfaces for this

  • The Website Obesity Crisis. Comments on reddit and Hacker News
  • The reckless, infinite scope of web browsers
  • I tried creating a web browser, and Google blocked me
  • Browser bloat has been a problem for a long, long time now.
  • The proliferation of browser-based text editors (StackEdit, Dillinger, Editor.md, WordPress) that try to do too much and they end up falling flat on their face cos nothing beats the responsiveness of editing locally.
  • The flipside of the above is I can use editors native to each platform. This post was typed on vim, then pasted into WP, for example. This makes for a much, much nicer editing experience specially when doing long-form text or to-do lists.
  • Avoiding lock-in. It was a drag to move from one platform to another and paste everything manually, cos all of these tools depend on locking you in.
  • Security. My Nextcloud instance is exposed to the Internet but I can always implement more things cos I control the network, the hardware, and the operating system.
  • Other people who were also on search of a good editing experience, like this, or this.
  • Easy migration of mark-up. I’m trying to use editors that support CommonMark since that way I can always be more or less sure of how something is going to look if I export it elsewhere, and I have the freedom of switching to something else like ReStructured Text or AsciiDoc, which I have considered.

I’m super excited about this. My notes en’t locked in anywhere and they’re all in plain-text, which is the only thing guaranteed to not change in the next 20 years,

Another attempt at a note-taking workflow Read More »

Wiki.js 2 with Nginx Installation

For the past few months I’ve been using Tiddlywiki as a memory dump but been having some issues. First started with the dreaded XMLHttpRequest error:

Error retrieving skinny tiddler list: XMLHttpRequest error code: 404

Which the available documentation offers no help with and the developers just shrug at. Then it just ate a fucken shotgun shell deep down its throat:

Internal JavaScript Error: TypeError: etag is null

We en’t here for that shit so on we went looking for an alternative that treats markdown as a first-class white citizen in apartheid america. Found wiki.js, which seems to have that, and here we are.

What follows is a guide written after a week of bashing our head against multiple desks because devlopers are morons who don’t know how to write documentation, if they even bother writing any. What is available for wiki.js is fucken laughable or only applies to the 1.x series. Real developers are extinct, by the way.


This is what worked for us on Debian 9. You will have to adapt this for your own OS and hosting configuration. We’re not at fault if the results eat your pet, fuck your significant other, and make your mom call them daddy.

Ingredients

This assumes DNS is already routing properly, outgoing mail works, and you’ve already dealt with your firewall. This setup gets you a wiki.js installation with nginx as a reverse proxy running security.

All commands are executed as root.

Installation

Install what you need

# aptitude install nginx-extras postgresql postgresql-contrib pgcli nodejs certbot python-3-certbot-nginx

Download and extract wiki.js (assuming we’re at /var/www) like the documentation says:

# wget https://github.com/Requarks/wiki/releases/download/2.3.81/wiki-js.tar.gz
# mkdir wiki
# tar xzf wiki-js.tar.gz -C ./wiki
# cd ./wiki
# mv config.sample.yml config.yml

Configuration

Nginx

Edit your configuration file for nginx so it passes everything to the wiki cleanly through nginx. The original configuration was generated by nginxconfig.io and incorporates stuff from the official documentation

As of right now (2020-05-16_14-28) they are valid and working server blocks

server {
    listen 443 ssl http2;
    listen [::]:443 ssl http2;

    server_name wiki.domain.invalid;

    # SSL
    ssl_certificate /etc/letsencrypt/live/wiki.domain.invalid/fullchain.pem; # managed by Certbot
    ssl_certificate_key /etc/letsencrypt/live/wiki.domain.invalid/privkey.pem; #managed by Certbot
    ssl_trusted_certificate /etc/letsencrypt/live/wiki.domain.invalid/chain.pem;

    # security headers
    add_header X-Frame-Options "SAMEORIGIN" always;
    add_header X-XSS-Protection "1; mode=block" always;
    add_header X-Content-Type-Options "nosniff" always;
    add_header Referrer-Policy "no-referrer-when-downgrade" always;
    #add_header Content-Security-Policy "default-src 'self' http: https: data: blob: 'unsafe-inline'" always;
    add_header Strict-Transport-Security "max-age=0" always;

    # . files
    location ~ /\.(?!well-known) {
        deny all;
    }

    # logging
    access_log /var/log/nginx/wiki.domain.invalid.access.log;
    error_log /var/log/nginx/wiki.domain.invalid.error.log warn;

    # reverse proxy
    location / {
        proxy_pass http://127.0.0.1:3000;
        proxy_http_version                  1.1;
        #proxy_cache_bypass                  $http_upgrade;
        proxy_set_header Upgrade            $http_upgrade;
        proxy_set_header Connection         "upgrade";
        proxy_set_header Host               $http_host;
        proxy_set_header X-Real-IP          $remote_addr;
        #proxy_set_header X-Forwarded-For    $proxy_add_x_forwarded_for;
        #proxy_set_header X-Forwarded-Proto  $scheme;
        #proxy_set_header X-Forwarded-Host   $host;
        #proxy_set_header X-Forwarded-Port   $server_port;
                proxy_next_upstream error timeout http_502 http_503 http_504;
    }

    # gzip
    gzip on;
    gzip_vary on;
    gzip_proxied any;
    gzip_comp_level 6;
    gzip_types text/plain text/css text/xml application/json application/javascript application/rss+xml application/atom+xml image/svg+xml;
}

    # HTTP redirect
server {
    listen 80;
    listen [::]:80;

    server_name wiki.domain.invalid;

    # ACME-challenge
    location ^~ /.well-known/acme-challenge/ {
        root /var/www/_letsencrypt;
    }

    location / {
        return 301 https://wiki.domain.invalid$request_uri;
    }

 }

SSL

Using Let’s Encrypt SSL certificates:

# certbot

Go through the wizard and it will automatically fix the SSL entries on your server blocks. You could also do this if you know what you’re doing and don’t want certbot to mess around with your files:

# certbot certonly --webroot -d wiki.domain.invalid --email mail@domain.invalid -w /var/www/_letsencrypt -n --agree-to-tos

Nginx Testing

Test and reload your configuration:

# nginx -t
# service nginx reload

Watch out for any errors, as usual. At this point Nginx will be serving files but as wiki.js isn’t setup yet you’ll get HTTP 502 errors if you try to visit the site on a browser. This configuration plays well with other sites being hosted on the same server.

Postgres

Secure your Postgres installation:

# sudo su postgres
$ passwd

Then setup your database. pgcli has smart completions turned on by default and looks pretty.

$ pgcli

> create DATABASE wikijs;
> create USER wikijs_user with ENCRYPTED PASSWORD 'Strong password';
> grant ALL PRIVILEGES on DATABASE wikijs to wikijs_user;
> \c wikijs
> CREATE EXTENSION pg_trgm;
> exit

$ exit

Wiki.js

Edit config.yml and make the appropriate changes:

  • Port should match what was configured in the nginx https server block (3000)
  • In db section, enter your database credentials
  • Do not enable SSL unless you are not to run this behind a proxy. This might work on a developer workstation but on the public internet you’re asking to get it up the ass, no lube.

Once this is done, start the application and watch for any errors

# node server

At this point you can visit your site and go through the installation wizard.

Configuration

There are a bunch of things the official wiki.js documentation only mentions offhandedly, or that you’ll only find out if you go rooting around in the issues tracker.

Home Page

You can name it anything you want but if you make the path anything other than /home wiki.js will freak out on you and send you on a loop.

File Storage

By default wiki.js will keep all its shit on the DB, which is a fucken stupid bad decision. We like making good decisions so we need to tell wiki.js to keep its shit in the filesystem:

  1. Go to Administration > Storage
  2. Enter the desired absolute path for your stuff, like /var/www/wiki.domain.invalid/wiki-content
  3. Enable the target
  4. Apply the changes

We’re unsure if this means wiki.js will actually use file storage to begin with, but at least you’ll be able to create quick backups of all your stuff. You have backups and you test them, right?

Search Engine

The default search is slow AF, so we’re going to use something better

  1. Go to Administration > Search Engine
  2. Select Database – PostgreSQL
  3. Apply the changes

Finishing thoughts

This thing has potential but it’s got a long way to go before it can look up to MediaWiki. If you find issues with this holler at me on the twitters.

Wiki.js 2 with Nginx Installation Read More »